Measurement guide
PROPORTION / FIT / YOUHow to Measure Your Body for Your Body Shape Accurately
To measure your body for a body-shape comparison, use a flexible cloth tape and record four circumferences in inches or centimeters: around the widest shoulder curve, the fullest bust, the natural waist, and the fullest hips. Stand comfortably, keep the tape level where possible, and let it touch without squeezing. Compare upper-body and hip measurements first, then note how much smaller your waist is. The numbers describe proportions; they do not assign a permanent type or determine how clothes must look on you.
| Compare | What it helps you notice |
|---|---|
| Shoulders or bust versus hips | Which part of the outline is broader, or whether they are close. |
| Waist versus upper body and hips | How much the middle curves inward. |
| Measurements plus a mirror check | Whether the measured pattern matches the outline you see in clothes. |
Understanding the Proportions and Anatomy of the Silhouette
Shoulders, bust, waist, and hips are four different landmarks. A shoulder loop reflects the outer upper-body line, while a bust loop reflects fullness at the chest. The natural waist is where your torso indents or folds when you bend sideways; it may sit above your navel. The hip measurement goes around the fullest curve of the seat, which can be lower than the hip bones. These are circumferences, not straight-line widths.
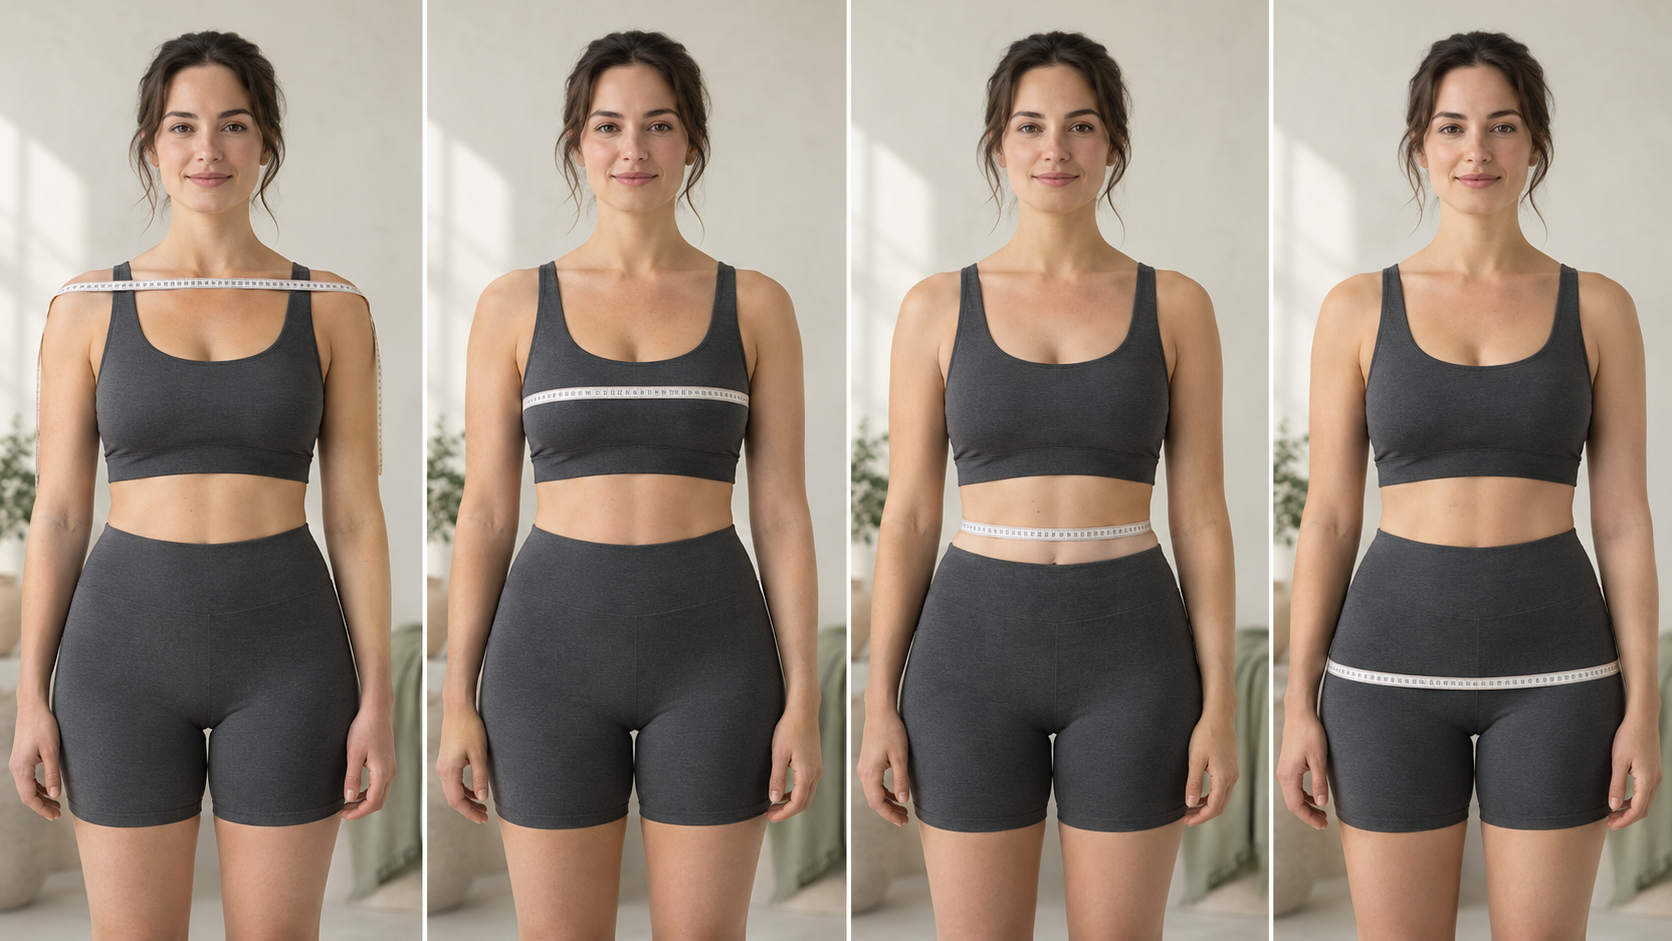
Clothing size and body weight cannot replace these measurements: neither tells you how the four areas relate. A structured jacket can also change the outline you see. Record the numbers first, then check the result in a mirror while wearing close-fitting, noncompressive clothing. If you are starting from the body-shape overview, this is the detailed method to measure your shoulders, waist, and hips.
Prepare for a consistent measurement
Use a flexible cloth tape, a mirror, and a place to write four numbers. Wear the same lightweight clothing or undergarments for each reading. Stand upright with your feet relaxed and arms by your sides; ask someone to help if you cannot keep the tape level around your back. Breathe normally. The tape should be comfortably snug, with enough room to avoid pressing into the skin. Simplicity’s measurement guide also advises a comfortably snug tape and identifies the fullest bust, natural waist, and fullest hip as the reference points.
Measure the four landmarks
- Shoulders: Run the tape around the outer curve of both shoulders and upper arms at the broadest point. Keep your arms relaxed. This shoulder circumference is distinct from shoulder width measured straight across the back; do not compare one with the other.
- Bust: Wrap the tape around the fullest part of the bust and straight across the back. Check in a mirror that it has not climbed or slipped.
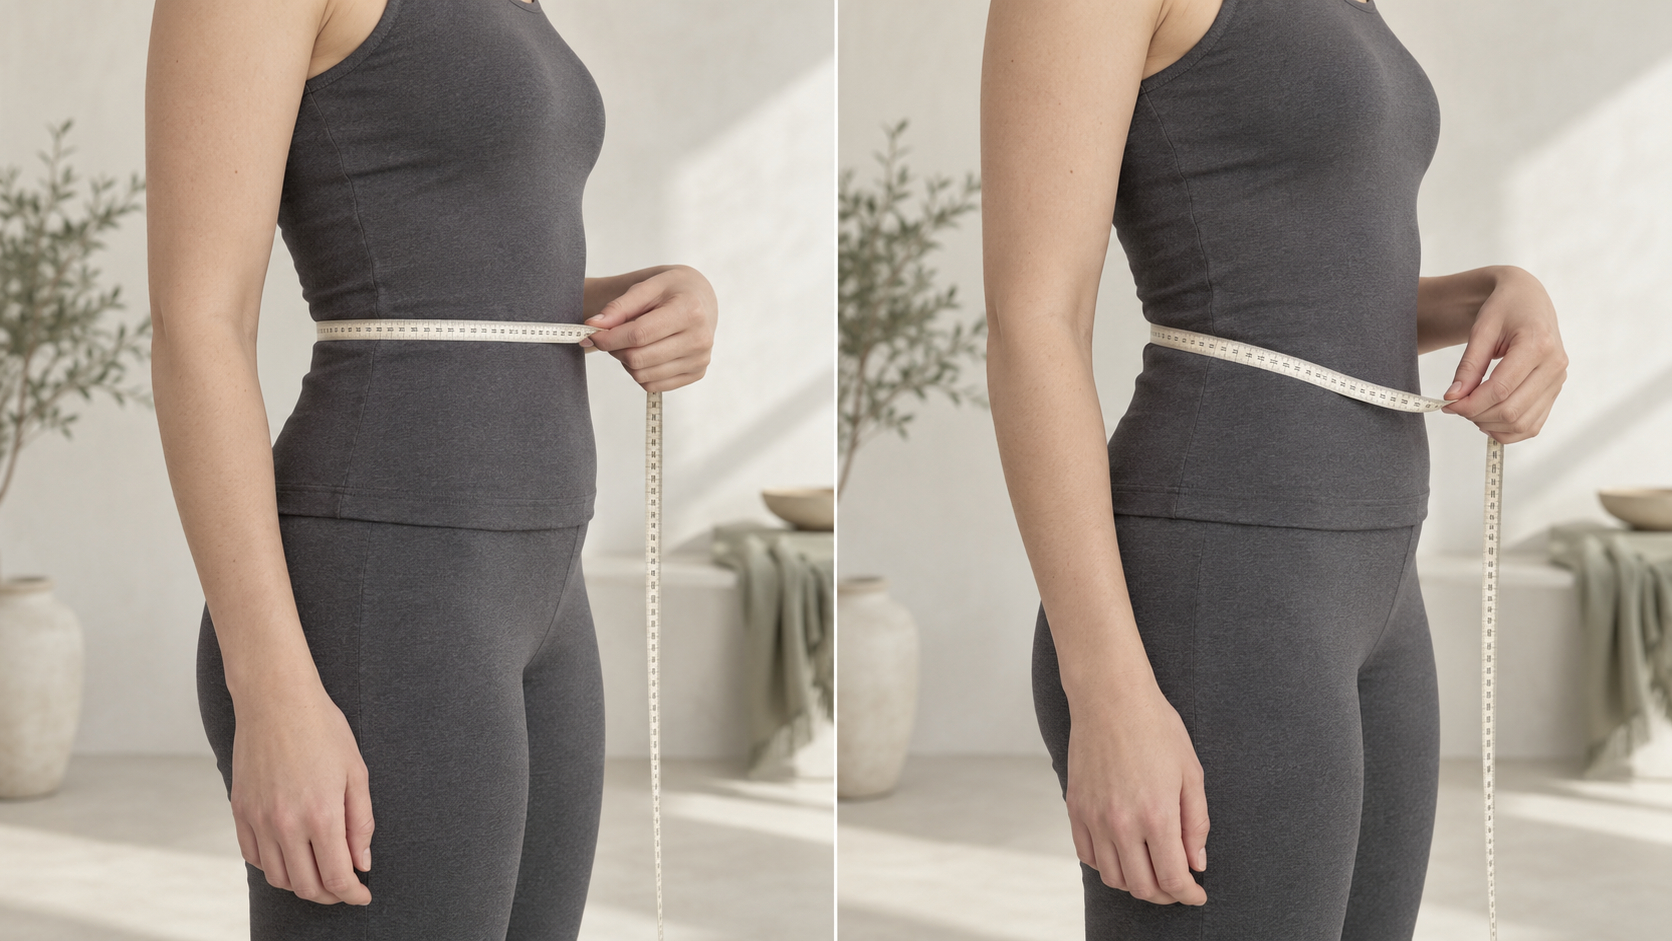
- Waist: Find the natural indent by bending gently to one side, then return to a relaxed upright stance. Wrap the tape around that point without pulling it tight or holding your breath.
- Hips: Wrap the tape around the fullest part of the seat. Move it slightly up or down to find the largest circumference, then keep it level.
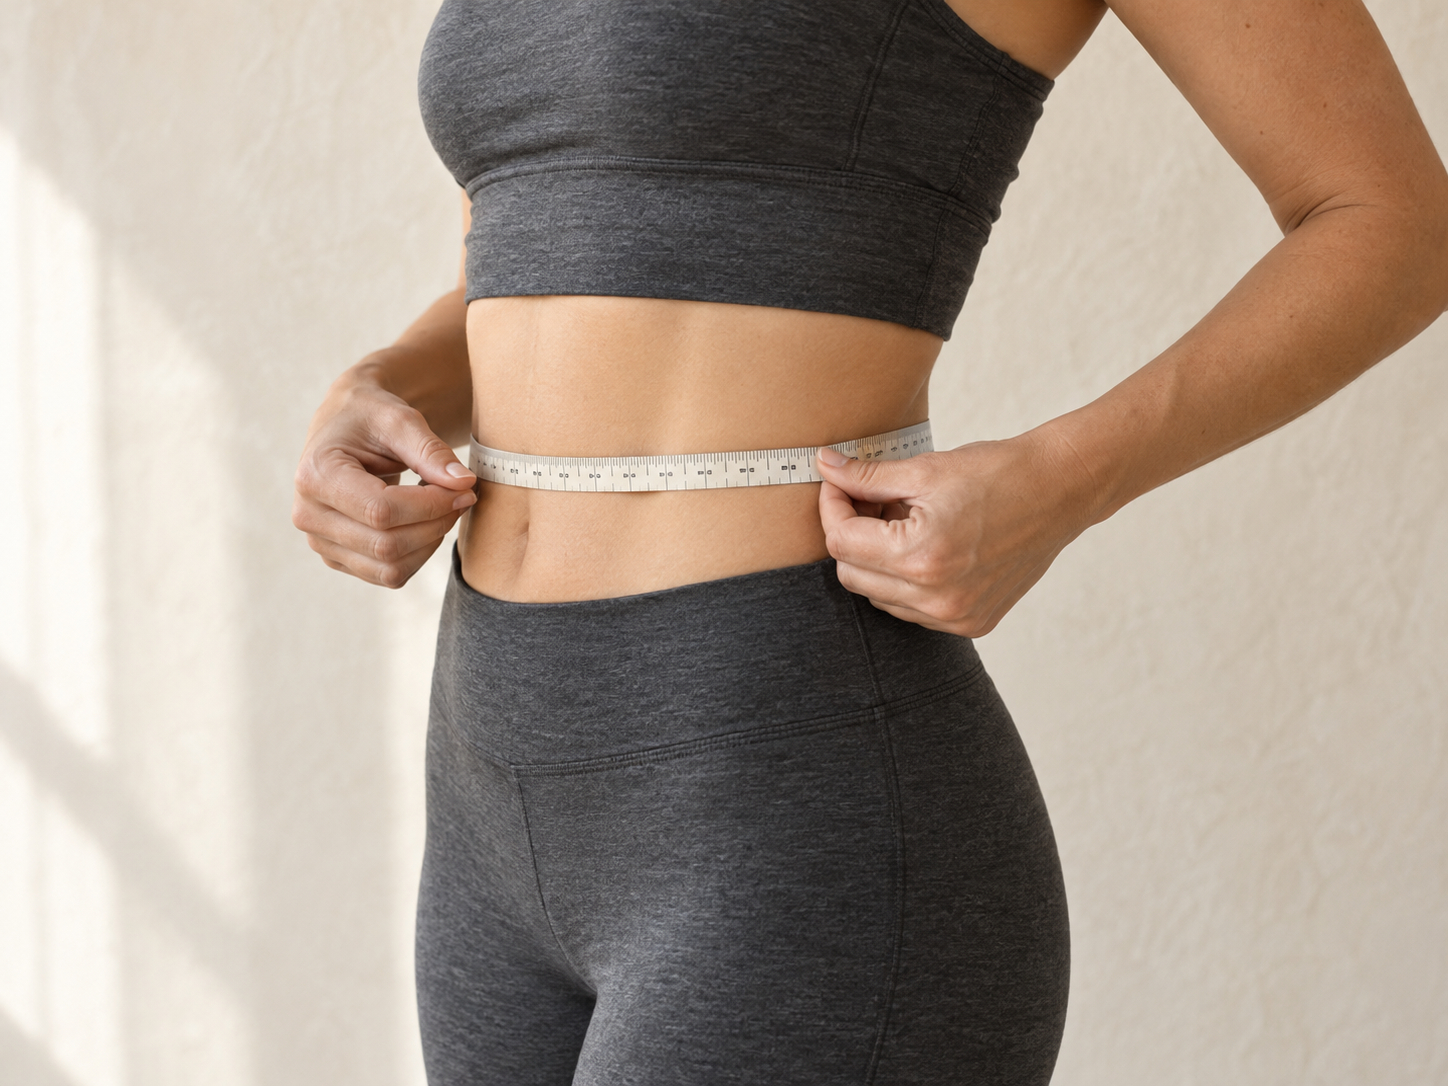
Write down the unit beside each number. Repeat a measurement if the tape twists, slants, or changes tension. A second reading is more useful than trying to make a borderline number fit a category. If you measure over clothing for one area, do so consistently for the others.
Identifying the Silhouette: Key Visual Signs and Formulas
Compare the shoulder or bust circumference with the hips; choose one upper-body method and keep it consistent. To express a difference as a percentage, subtract the smaller number from the larger, divide by the larger, and multiply by 100. For example, 40-inch hips and a 38-inch bust differ by 2 ÷ 40 × 100 = 5%. Then compare the waist with the upper body and hips in the same way. The arithmetic describes relative size; it does not prove a precise label.
For one published set of reference boundaries, The Concept Wardrobe’s body-shape guide treats bust or shoulders within 5% of hips as close and uses a 25% waist difference to distinguish its hourglass and rectangle examples. Those are that guide’s conventions, not universal thresholds. A visual check matters when measurements sit near a boundary.
On a small screen, swipe the table sideways to compare columns.
| Reference shape | Measurement pattern to check | Visual clue | Nearby description |
|---|---|---|---|
| Hourglass | Upper body and hips are close; waist is distinctly smaller. | Noticeable inward waist curve. | Rectangle if the curve is gentler; pear if hips lead. |
| Pear | Hips are larger than the chosen upper-body measurement. | More apparent width below the waist. | Hourglass if upper and lower widths look balanced. |
| Apple | Waist and upper body are prominent relative to hips. | Fuller middle or upper outline. | Rectangle if the sides look straighter. |
| Rectangle | Upper body and hips are close; waist difference is less marked. | Relatively straight sides. | Hourglass if the waist curve is stronger. |
| Inverted triangle | Chosen upper-body measurement exceeds hips. | More apparent width at shoulders or bust. | Hourglass if hips appear similarly broad. |
High or low waist placement, a longer or shorter torso, posture, and ordinary asymmetry can change how a clothing seam reads without changing these horizontal comparisons. Use the body proportions guide for the separate torso-versus-leg question. If your shoulder-based and bust-based comparisons disagree, keep both observations rather than averaging them into a false precision.
Styling Principles: Balance, Drapery, and Fabric Choice
Measurements can suggest a clothing experiment, not a rule. Decide whether you want to emphasize, soften, or simply follow a line, then compare garments that fit comfortably while you stand, sit, and move.
Strategic Necklines and Shoulder Cuts
A boatneck can draw the eye across the shoulders; a V-neck draws it toward the center. A raglan seam can soften the edge of a sharply defined shoulder line. If your upper and lower measurements differ, try two necklines with the same trousers and observe the effect before changing anything else. Keep the shoulder fit comfortable.
Waistlines and Midsection Drape
A high-rise waistband or wrap that closes at your natural waist makes that point visible. A mid-rise can move the visual break lower; an empire seam moves it above the waist. A fluid wrap may skim the middle, while a firmer fabric can hold a clearer outline. The useful test is where the seam actually falls on your torso.
Hemlines and Trouser Silhouettes
An A-line skirt adds movement below the waist; straight trousers keep a continuous line; wide-leg trousers add width from the hip downward. A cropped hem creates a lower-leg break. Compare the same top with two hem or leg shapes to see which balance you prefer. Fabric drape and footwear can alter the effect.
Common Misconceptions and Dressing Nuances
Your measurement pattern can shift over time, and two adjacent descriptions can both be useful. None of the labels bans a color, cut, or garment. If a number is close to a guide’s cutoff, pay more attention to real fit and the visual effect you want than to the label.
Geometric shape labels describe a horizontal outline. Kibbe’s Image Identity approach and Kitchener’s style essences are separate style frameworks; four circumferences cannot establish either identity or essence. Read the distinct Kibbe guide and style essences guide for their own terms.
Frequently Asked Questions
How do I know if I have this body shape or a neighboring one?
Compare the feature that separates them. For pear versus hourglass, check whether hips clearly lead or upper and lower measurements are close. For rectangle versus hourglass, notice the waist difference. If the result changes with your upper-body method, both descriptions can remain useful.
Can weight gain or loss change my primary silhouette?
It can change measurements and the visible outline, but the pattern is individual. Recheck your current numbers when clothing fit changes; you do not have to preserve an earlier label.
What is the single most flattering clothing formula for everyday wear?
There is no formula for everyone. Start with a comfortable, well-fitting top and bottom. Compare a defined versus relaxed waist, or straight versus wider legs, and keep the outfit whose balance and movement you like.
How does vertical proportion (torso vs legs) affect this shape?
Torso and leg length affect where a waistband, jacket hem, or color break appears. They do not replace the shoulder, bust, waist, and hip comparison. Try two rise heights or hem positions with the same basic outfit.
Explore Your Personal Proportions
Use your four numbers and a mirror check to choose one or two reference shapes, then try a specific clothing change. If you prefer a photo and short questionnaire, the body type test is planned as a separate flow; photo analysis and personal results are not available yet.